

Add the widget to your website
Any website can show the ParsChat widget with a short piece of code. On WordPress, the WordPress plugin does this for you.
Create a widget service
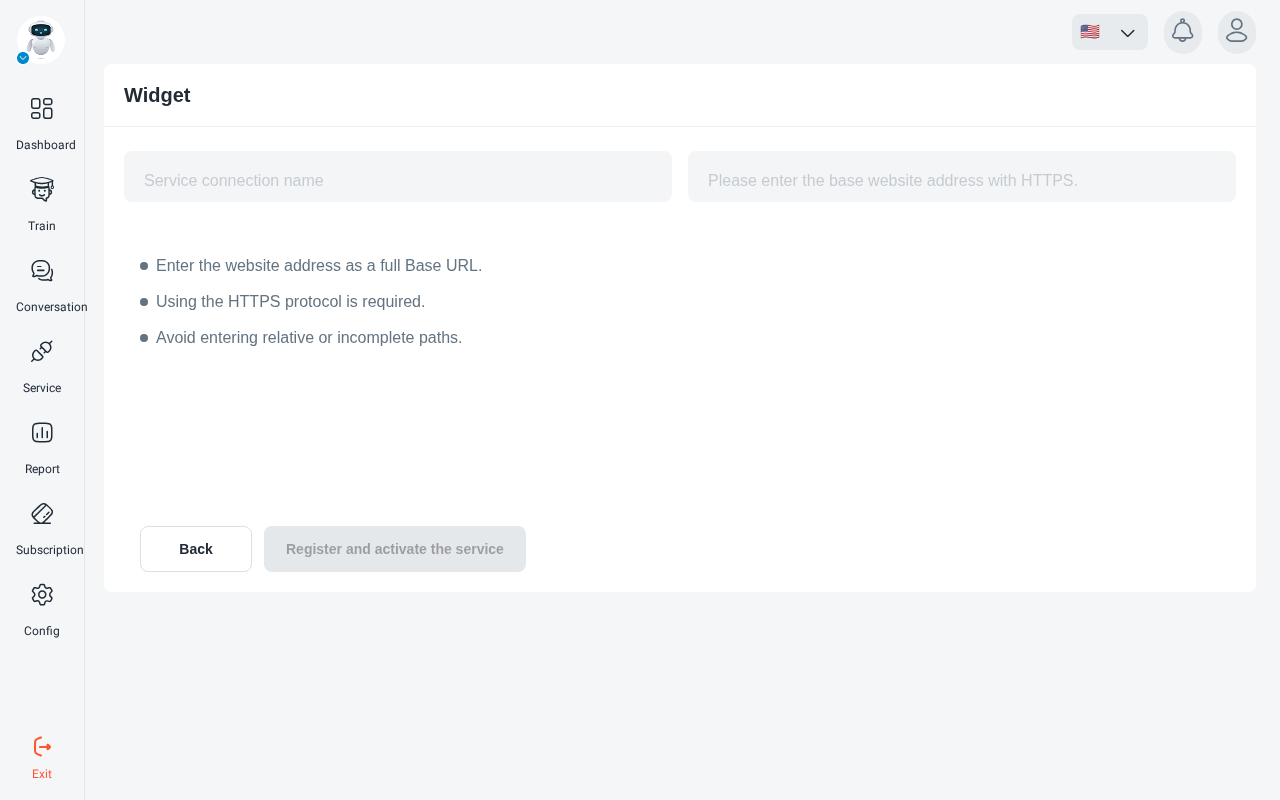
Open your robot, go to Service and click connect to widget. Give the service a name
and enter your website’s base address (it must start with https://). Click
Register and activate the service.
If the robot already has a widget service, open it instead. Each robot has one service of each type.
Copy the code
Copy the code shown in the panel. It looks like this and carries your service’s own token:
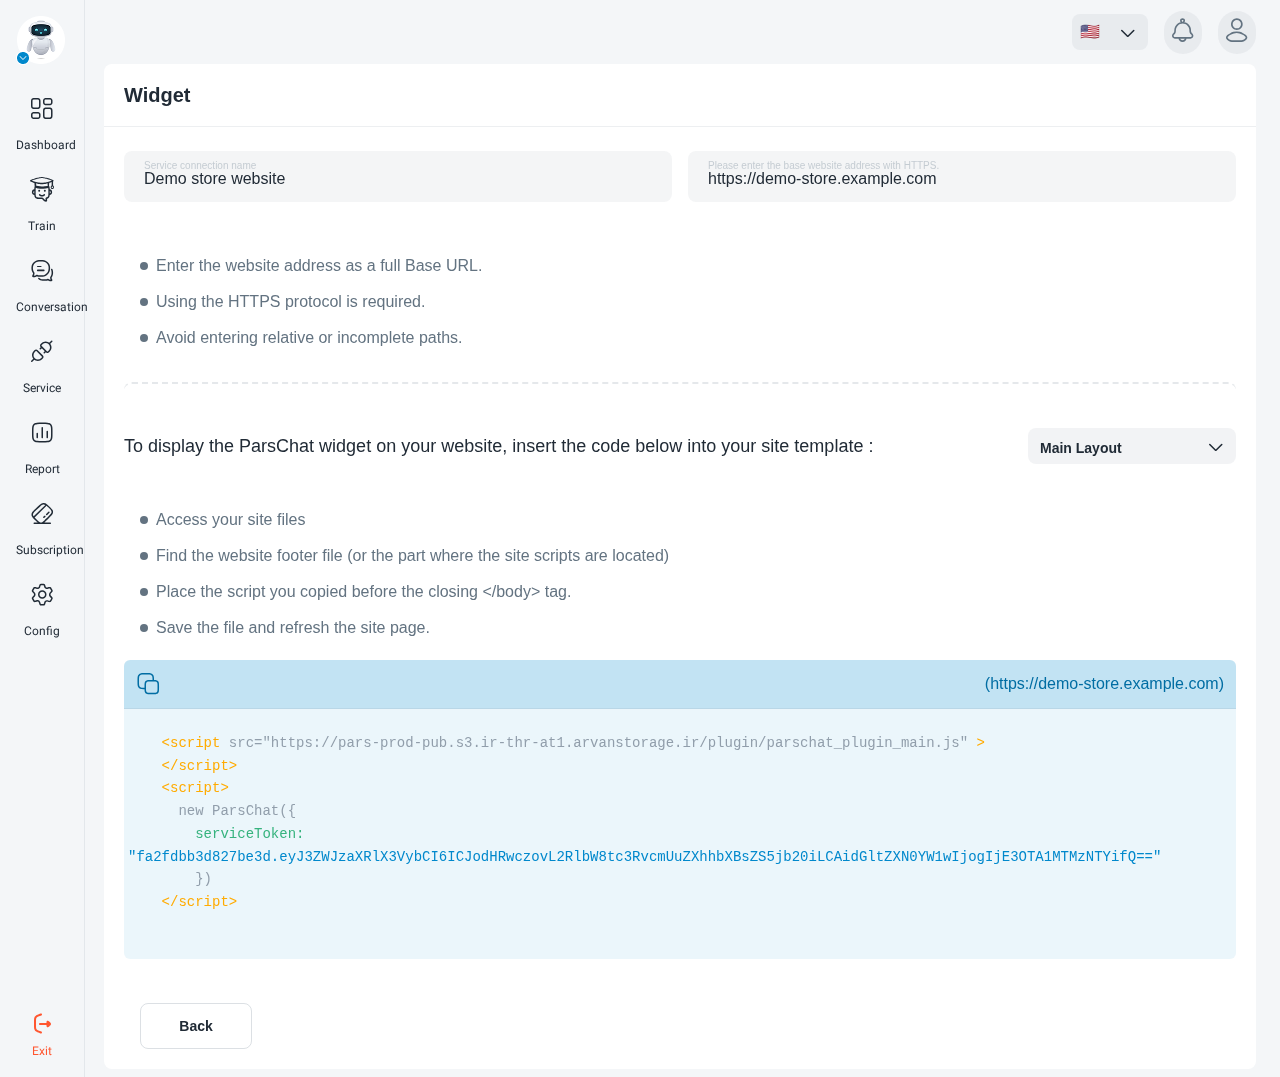
Copy the code from your panel, not from this page. The serviceToken is unique to each
service and is filled in for you there.
The widget doesn’t appear
- Check the code was copied complete and unchanged.
- Check the
serviceTokenvalue is correct. - Open the browser console and look for errors.
- If your site uses a cache or CDN, clear it so visitors get the updated pages.
Next
Change the widget’s look and position in Widget appearance.